Pages

Showing posts with label Christmas. Show all posts

Saturday, November 29, 2014

a Christmas Rental home

So i have been going a bit christmas decorating crazy lately..hehehe. I think I am just so excited that this time next year we should be in our forever home. So I am gearing up for that. Whatever I make now, can go in that house. And I makes me so happy to just think that its coming closer. Building permit in hand folks, we should start in the spring.! Hip Hip Hooray!!!
 these pix show more of a orange color to the ribbons on the tree. In person they are actually gold. I am still working on my indoor picture taking skills. Perhaps next year I will attempt making my own tree skirt. Or maybe if I get bored this year;-)

my great grandmothers old danish plate. It reads 'hjemme er bedst". ~ to be home is best.
My grandma says that she always remembers that her mom had it on her wall in Denmark as far back as she can recall. I now use it for a tree ornament. :-) It belonged to the Grandmother that my girls got their red hair from.


 Its been so fun decorating with natural elements...I have done this the past few years, and I dont think I could ever go back to not using real pine in my home. I do have a few faux pieces too. And I love those too. But there is just something nostalgic about the "real".
 Love me some pomegranates!

 My santa baby collection. I took these pixs of my babies on their first christmas'. They are one of my most treasured holiday decorations:-)

My sweet hubs surprise antique compass that he brought home for me one day...

 "S" cup that ONLY Santa can use on Christmas Eve...
 For the baby pictures I have their names and the year they were taken. Its fun to see how much they have grown. And makes me want my babies little again!
 Above, my 3 tier stand that I found this past summer. I have been looking ALL over for this particular one for YEARS now and I came across it online by chance one day. I about died! I sooooooo love it.
 The JOY banner was from last year. I made it, with one of Shanty 2 Chics free downloads. Love their style.
I added some of my crystal metal ornaments onto the chandelier...its pretty I think.
(please dont mind the odd light bulbs!lol, this is a rental folks;-) And this lamp is NOT centered over the dining table, which drives me CRAZY because it looks so odd. I wanted to add some greenery to it, but it just made me mad that it is off to the side of the table. And that would add more oddness to it. Oh well....lol.

Wednesday, November 26, 2014

Boxwood christmas wreath


I'm going a bit wreath crazy;)....here's my simple christmas wreath. I used Boxwood, burlap and crimson silk ribbon. Done. This one was also made the same way as my advent wreath. I love it:)
And a tiny wreath too...
I love this one too. It has lots of elements from my home decor this season.

Happy holidays!
-cat

Tuesday, November 25, 2014

Our new christmas tree.

I can't Explain how excited I am about this! You all know that I have had three small trees for probably about seven or eight years. This is because of our apartment was too small for a big tree. But not anymore even though that we are in a temporary apartment while her house is being built I wanted to make sure that I got a big nice tree:) it's honestly been a dream of mine! Lol. I was driving my has been absolutely crazy, looking for the perfect tree that was in our budget. All I did all day long was look at trees online.. there are like 5 million different kinds! Pre-lit, non lit,down swept, quick set, hinge trees,flocked trees, white trees, LED lights,slim, pecil, twinkle lights, multicolored lights, swivel tree, fir real technology, I can go on and on and on! Ugh! And that's not even mentioning the different TYPES of trees. 
Well, my husband , my wonderful husband  , on one of those evenings where I had finally narrowed it down to two choices, completely surprised me and brought one of my choice trees home! It was the day before Halloween. We put it up in the garage to behold it's beauty.. and then put it back down in the box. Ever since then it was haunting me. I have wanted to put it up so badly and I finally gave in two weeks before Thanksgiving! Have never done that! Lol. While others are black Friday shopping I always put my tree up on that day and do all of my shopping online:) well not this year.:-) 
This tree is a BlueSpruce. It has LED white lights and has several twinkle settings. It's the perfect mix between a slim and a pencil tree and I love it:) and the best part of it ALL is that my sweetheart picked it out and brought it for me. 


I made several of the decorations this year. And bought some awesome new ribbon that was on sale. I used some of my ornaments from my old trees as well. 

My button garland from last year I used and I was able to find more of it online this year:) sorry for the bad quality pic, my computers acting up so all I get to use is my wonderful cell phone:) 

Stay tuned for my tutorials on how to make the homemade ornaments you see.
~cat

Saturday, November 22, 2014

DIY dried Orange slices

I really like the way how natural Christmas decorations give a certain type of nostalgia to a space. It reminds me of Victorian Christmas' or Charles Dickens' A Christmas Carol. So I wanted to try and add some natural Orange slice ornaments to my tree. And maybe say I absolutely love how they turned out! And it was ever so easy. 

Start with navel oranges. I bought about five and got about 20 ornaments out of them. 
Preheat oven to 225°F.
First slice the oranges as thin as you can with a really good slicing knife. Watch your fingers! (some people like to use a fork to hold your orange in place. )
 
Next blocked your orange slices on the kitchen towel or paper towel to release the excess moisture. 

Place the orange slices on a baking rack and place in the oven  on the middle rack. 

Let these babies cook in the oven from 2 to 3 hours. Well every 30 minutes turn the oranges around so they don't stick. Watch out they don't burn some of the slices or thinner than others and usually the ones on the outer edges get darker quicker to remove those first. Let them dry out in the oven until they are no longer juicy. 
Here is how mine look like after they came out of the oven:
Let them cool for a bit and then let your imagination take over what they're going to be used for:) 
I used mine for both my advent wreath and for Christmas tree decorations. 
I poked a hole in it with a large toothpick to make a threading whole (is that a word?) lol... For my jute to string. 
The End

~ Cat

Advent wreath {striped ribbon and oranges}

One of my favorite scandinavian christmas traditions we have is the lighting of the advent wreath. We light a candle 4 Sundays before Christmas. My kids love it. What we do is turn off all the lights in the house and just have this aglow with our Christmas tree as we sing carols and eat a homemade christmas treat. This year I invited my mom over to craft with me as we made this wreath. It was a blast!
I found some greenery to cover the wreath with. I don't know the type of tree it came from...sorry. But it was nice and soft to work with. Cut it into small pieces and than tied it onto the wreath with green floral wire. 
 {Sorry for the bad pix, my camera ran out of juice when I was about to take pix, so iphone quality it is!}
I added the candles {bought at Ikea for $1.99 a piece.} by carefully hammering a nail into the bottom of it. Than with some hot glue for extra support placed it onto the wreath. Lastly came the decorations. I dried some fresh oranges {how to post to follow}. And hot glued them on as well. Black and white Striped ribbon for more cuteness and than finished it by dusting a  small amount of gold glitter on the wreath itself. 
I can't wait to light the first candle. I almost have all my Christmas decor up now so stay tuned for more:)

~Cat

Friday, November 29, 2013

Children's room to CHRISTMAS room


Happy holidays everyone!
Hope you all enjoyed your thanksgiving. 

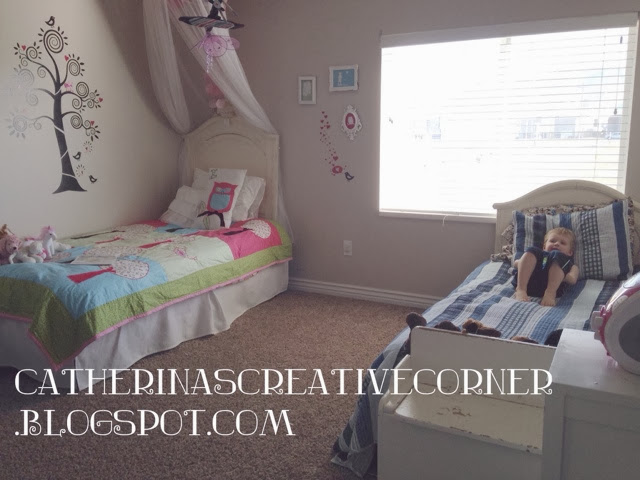
I have been super excited to share with you all the makeover that I did on my 6 year old daughter and 3 year old sons room. This is something I have DrEAmt about doing for years now; To completly transform their regular everyday bedroom to a Christmas themed bedroom.
I have planned and planned for a while now on how to do it. Basically I surprised them with new Christmas quilts and pulled out practically all their regular stuff in their room and replaced it with ChRiStMas things. I had soooo much fun doing this...

BEFORE
AFTER

The first thing i did was to find the perfect quilts. I wanted them to be holiday themed but not anything too "ugly sweater" styled ( if you know what I mean). I looked for something that could grow with them. Also in my romantic mind I would hope that when they had grown up and would someday come home from to visit their mom and dad for the holidays that they would come home to their quilts...lol...I know, I am a total sap and love anything sentimental. I found the quilt for my daughter on eBay and instantly fell in love with it! 

 Nikon Digital camera pic....mUuuuch better;-)
12/17/2013
I covered up her old wall applique with this home made christmas tree. I used command strips to keep it up and added a simple bakers  twine garland. A painted gold star to top it off.

For my sweet little boy I could not find anything that would match his sisters, and that still would be boy enough for him. I think I spent hours online...and than I realized that I would have to make one myself. Here it is...
Nikon Digital camera pic....mUuuuch better;-)
12/17/2013

My first attempt at quilting on a quilters sewing machine...my goodnes I was having WAY too much fun on this...especially with the "freehand foot". Oh dear, anyways...I LovE this new "brother" sewing machine!!!!! It ROCkS! I will have to post some more detailed pix with my Nikon, but for now folks, you get to view it through the eyes of my iPhone;-) lol ...

Next up sillouettes...
Oh dear, I have been working on some other sillouette projects ( will be posting them soon...but here's a hint..Christmas pillows). I just need to take their pictures so stay tuned!
So I replaced the old pictured sillouettes. With these new reindeer themes ones. Hello! I swoon everytime I walk by them!! I am very pleased how they turned out.:) I found some images online and than printed them out. Found my scissors and cut them out, than painted them with gold paint. I absolutely love how the texture shows through the gold. After 3-4 coats they look like they are gold leafed...stunning:) an unexpected surprise for sure! I glued them onto some music note fabric....( I also made snowflakes to cover up some stencils on the wall.
Another image....perfect for my boy and girls shares rooms.


A picture of the sillouette process
Christmas decor...
And to finish it off their very own tree ( thanks Ikea)
If I could only explain how big my kids eyes lit up when they saw the finish product! I surprised My little 6 yr old girl when she came home from scho...she walked into her room...and just stood with her mouth wide open, and a big smile on her face, her eyes wide and with both hands clasped together in complete awe!!! ( I had Christmas music playing In her room for the full effect)...The look on her face....priceless...It was .....TOTALLY worth it!! 
And there you have it...
A real little piece of Christmas heaven:)
Ps my littles have been going to bed wearing the Santa hats I left in their room...every night since!

Love it.

Thanks for stopping by:)
Cat

linking up with:
http://linda-coastalcharm.blogspot.com/
Related Posts Plugin for WordPress, Blogger...