Pages

Thursday, April 28, 2011

For the Love of Thrift stores {Ralph Lauren Faux Technique Glaze}

So I Love to go to the thriftstore to see what cheap junk I can make into my own treasures! I am currently working on my laundry room, making it lovely, and so when I happened upon these adorable shelves for $1 a piece I could not resist! I have a love for Glazing things, and this just worked out Splended! I think this small can of glaze will last me for the rest of my life, one only needs to use a tiny bit. So, here it is...my first new addition to my laundryroom redo...
what do you think?
Get some of this if u dont have any....its Wonderful!
BEFORE pic: Here they are in all their plan glory! 
AFTER: I sanded them....glazed them...and.....DONE! 
Here is a close up so you can see the texture and "antiqued" look it gave them.
And here is another; I just LOVE how they turned out. I will ALWAYS try to make an excuse for  using ME Glaze:-)

I brought this to the party at

Tuesday, April 26, 2011

I SO want this in my {someday} house!

I am constantly on the lookout for inspiration and ideas for when we build our own home {someday}. I say someday because, it is in our future plans. Plans that I wish would get here sooner, but the fates think it is better for us to stay here in our {"custom"} storage unit apartment for the time being. lol.....
So, so, so, so, so want this type of wainscoting in my house someday! Yup, this beauty was HOMEMADE! No...not by me, but my WONDERFULLY talented sisterinlaw Lindsay at CountryGirlHome. She has an amazing blog, you should check it out.
And as for what type of houseplan are we aiming for? Well here is a quick little example from an awesome houseplan website eplans. There are two, well actually 3 houseplans we love, but this one is currently our fav.We would like to make some custom changes to it of course. So, only time {and our pocket book} will tell what we will end up with...lol


Thursday, April 21, 2011

Construction Party {baby 1st birthday}!

Oh my goodness how I LOVE birthdays! Especially for my babies! My little boy turned 1 so it was time to get our Party on:-) We decided on Construction Zone for his theme. {Daddy thought a Pirate theme would be better for an older birthday}. So Construction it was! It is so hard these days; trying to find something not cheesy for this theme. You know, the kind of stuff you just already buy and all the work is done! Dont get me wrong, there is a time and place for that kind of party, e.g. last year when my baby was only 1 1/2 months old it was my daughters birthday, and we resorted to Tinkerbell store bought partydecor and it was WONDERFUL! But this year I had the time and energy to do something   homemade, so that is was it became:-) I am simply smitten, goin' NUTS about some of the Party planners out there like Amy Atlas and TomkatStudio....I want to be like them someday! :-)My inspiration came from the custom invite I made. I bought this adorable scrapbook kit online; Kristin Aagard Designs. SO CUTE! And the rest is "history". It was SO fun doing this party. "Gathering" all the little candy in my them colors: yellow/orange, blue and a dash of red. Here are some pix I took while my kids where taking there naps before the party...
Do you like how it turned out?
I do:-)
It started with his custom made invite!

CLICK ON IMAGES TO TAKE A CLOSER LOOK
A went with a simple chocolate Devils food cake for this one.  Added crumbled Oreo's on top and bottom for a dirt like effect. NO fondant {my favorite for cakes} : he needed to be able to DIG into it;-)
I made this banner from a free template found at one of my favorite party sites Tomkatstudio. Her parties are TO DIE FOR! Beware if you check out her site...you will never want to throw your parties the same way again!lol
Babies 1st year banner. A picture of him at each month mark. When I hung this up, I broke into tears....I cant believe how TINY my boy was! And wow...time just flies by, I need to ENJOY every minute with my little buba, because before you know it, he will be an all grown up smelly teenager! lol

And now I have a cute Jute banner to keep in his room {over his crib}. SO easy to make! All you need is ; Jute, pix, age tags & paperclips.....DONE!
Yummy Orange Cream Soda decorated for the occation:-) { Refreshing Drink}
Home made Cookie Pops! Tutorial to come soon:-) They were a HIT and oh so decadent!
{Drill Cakes} Chocolate cupcakes
Take home goodie bags! We had only invited the Grandparents so this was there party favors.
This tape measure was set out to 19 1/2"....my boys length at birth:-)
I just love Root beer barrels!
And Most importantly....my Mel LOVED his cake!!! What a MESS!;-) Luv u to pieces bud!


Post linked to: http://thirtyhandmadedays.com {Linkie Party 33}


Design Dazzle

Thursday, April 7, 2011

When I was about 8 years old, my art class in Denmark made silhouettes of ourselves. I have wanted to make some more ever since but never got around to it. Well I finally (20 years later) did it! I LOVE IT!!! I read that Nie Nie makes new ones of her family every year, so I thought I would start that too. {now to make a new one with my baby boy on it} What a great tradition. It is fun to see how we progress and change:-) And this is a fun way to be crafty...AND add inexpensive art to my house. I cant wait to make some more!

Mmmmm Muslin {No Sew Curtain}

Mmmm how I LOVE this fabric! The whole feel and look of this makes me honestly feel like I am part of a romantic Jane Austin novel or something, lol! I have in mind to redo my laundry room with yellow being one of the colors, so I decided to switch my old no sew curtains with a new set. {I originally wanted to make the first set white, but never could find the right fabric that I wanted, so the yellow, grey cream ones it became}. 
Now onto my new ones.....Muslin, let me tell you a little about it.

Muslin (English pronunciation: /muslin/), or less frequently: (/'mjus:sin/) is a loosely-woven Cotten Fabric introduced to Europe from the Middle East in the 17th century. It became very popular at the end of the 18th century in France. Muslin is most typically an unbleached or white cloth, produced fromcarded cotton yarn. It is often used to make sewing patterns, such as for clothing, curtains, or upholstery. Because air moves easily through muslin, muslin clothing is suitable for hot, dry climates.
Above: Fashions in muslin, 1838.
Below:Marie Antoinette, in 1783, in her famous "muslin" portrait {I love Marie Antoinette!}


Another set of my knock off Potterybarn curtains. {OH how I am obsessed with that store!}Yes, again another New Sew. The fabric was SUPER cheap $4.99 yrd. A lot better than paying big $ for the PB ones! And,  I only ended up using half of it.  It took me about 30 min to do this from Ironing, folding and glueing! Next to make are curtains for my bedroom in the same style {happy sigh} ;-) 
Like the little flower box to the right? My little girl made it at the HomeDepot for their free kid classes. We planted a sunflower and tomato plant in "miraclegrows greenhouses" today for a 1$ each. She is so proud. I am too.
Here is the curtain close up;

And now off to making a dress for me....Just kidding! {hmmm...or am I}
I LOVE MUSLIN!

Tuesday, April 5, 2011

Easter Decor & my {Jute Eggs}

Easter time! I love this time of year. Do You? Because nr. 1 Spring {usually}! Nr. 2 my birthday is in this month {sometimes it can be a bad thing too}lol. Nr 3. Easter hello! lol. I have never had any real Easter Decorations so now is the time to get some. I really want to focus on the Christian aspect of Easter, so I tried to incorporate elements from the Easter Story into my decor. Here is what I came up with;
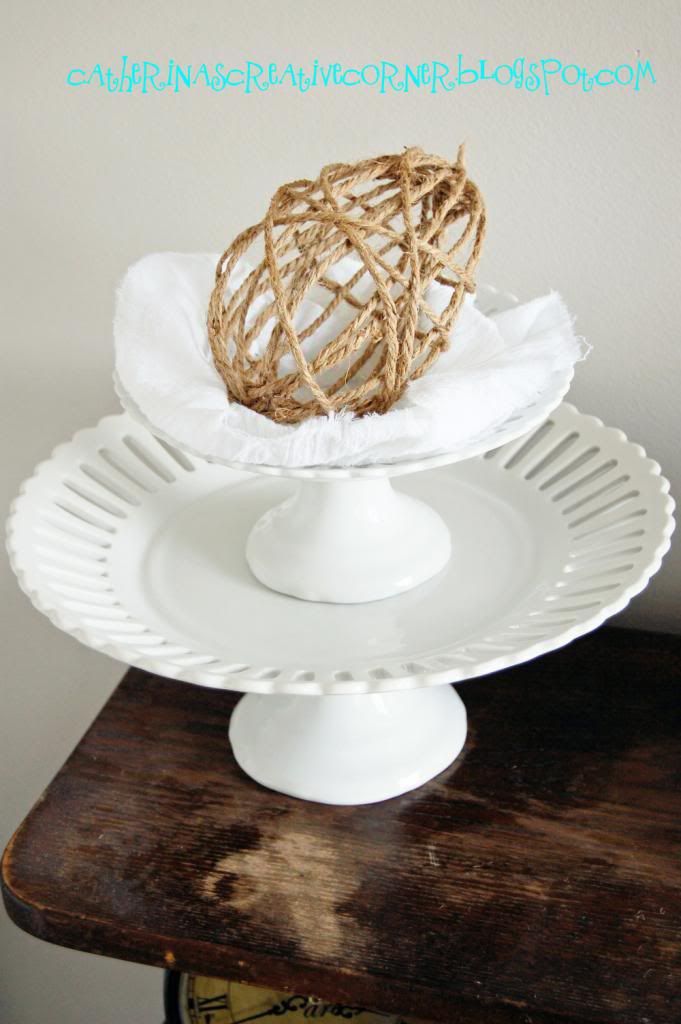
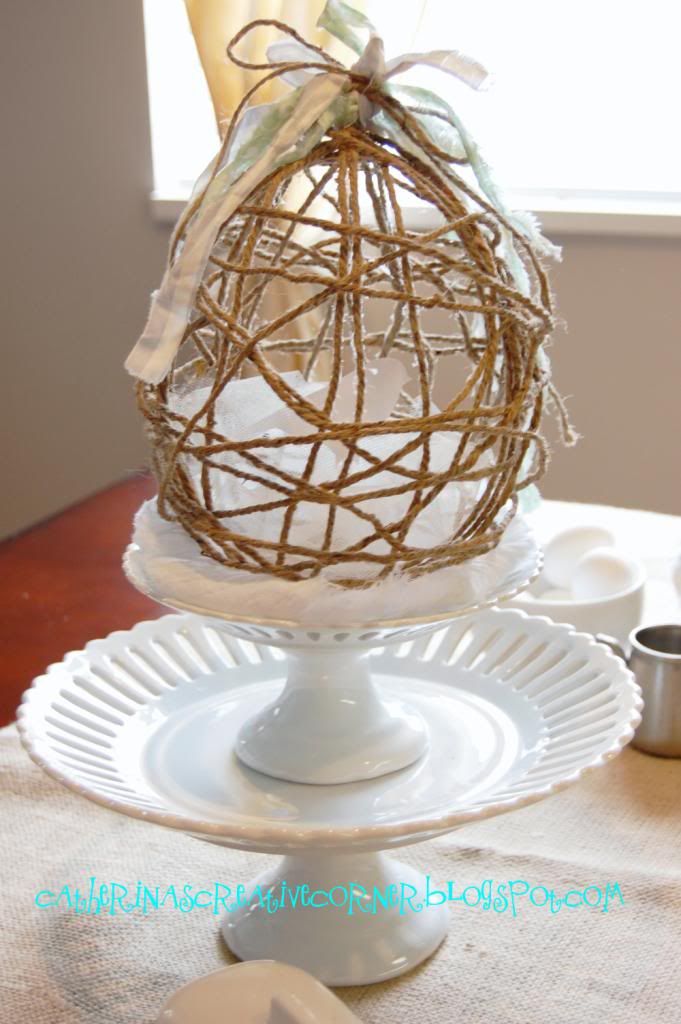
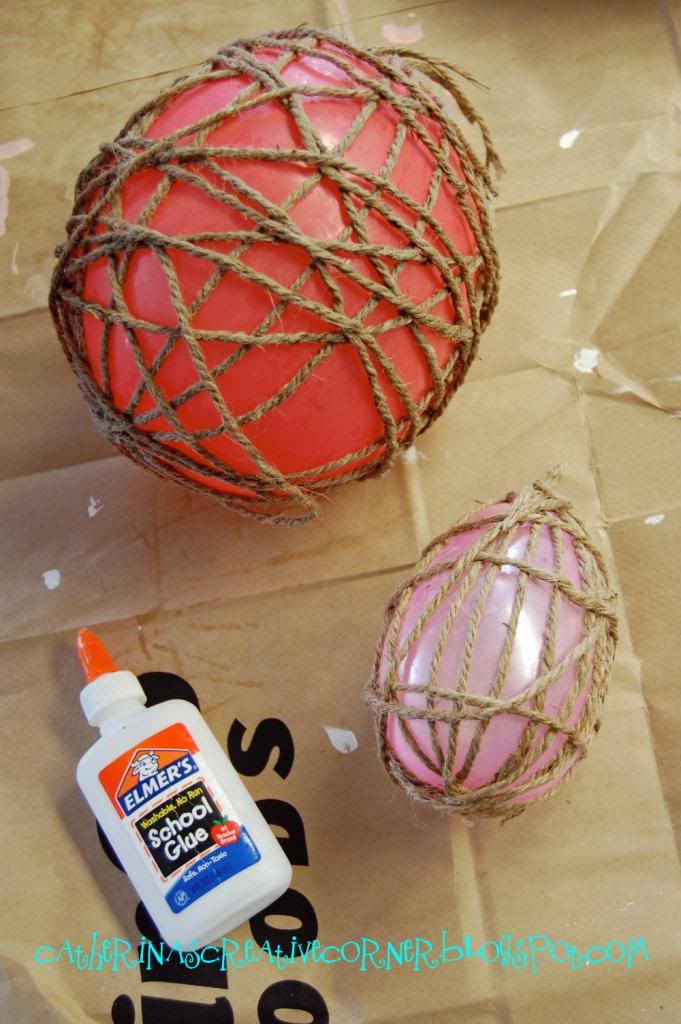
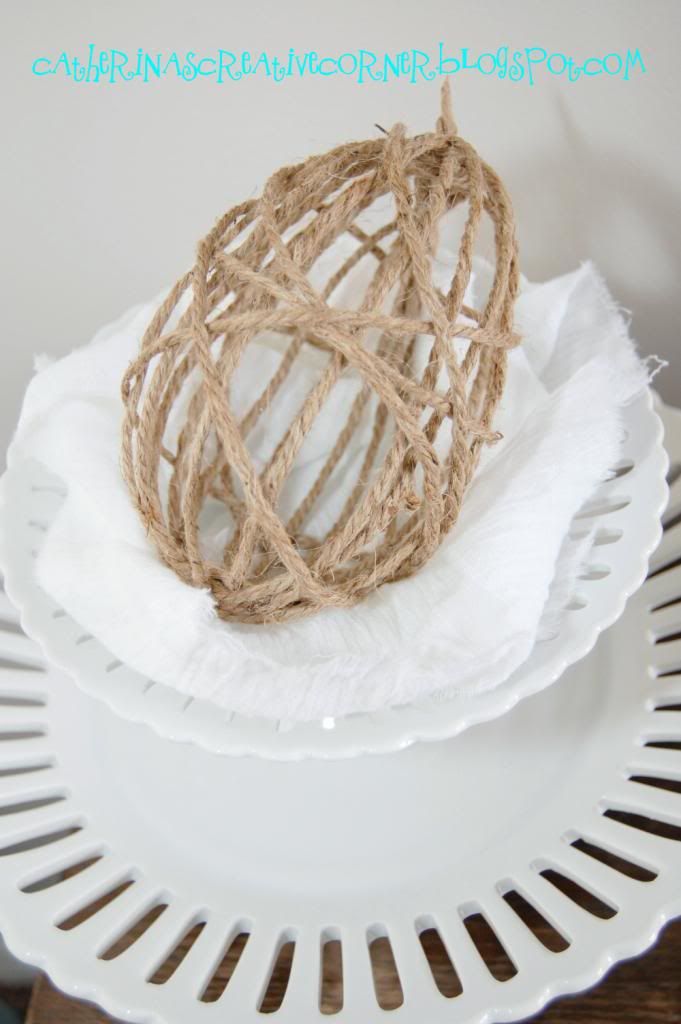
I am just LOVING my easter Jute Eggs! I have been thinking about making these for some time, and I was so excited that they turned out just how I had envisioned them. For a tutorial on how to make your own click here. I placed this Egg on a bed of white gauzelike material. It reminds me of what HE would have left behind {those 3 days after} in the tomb.
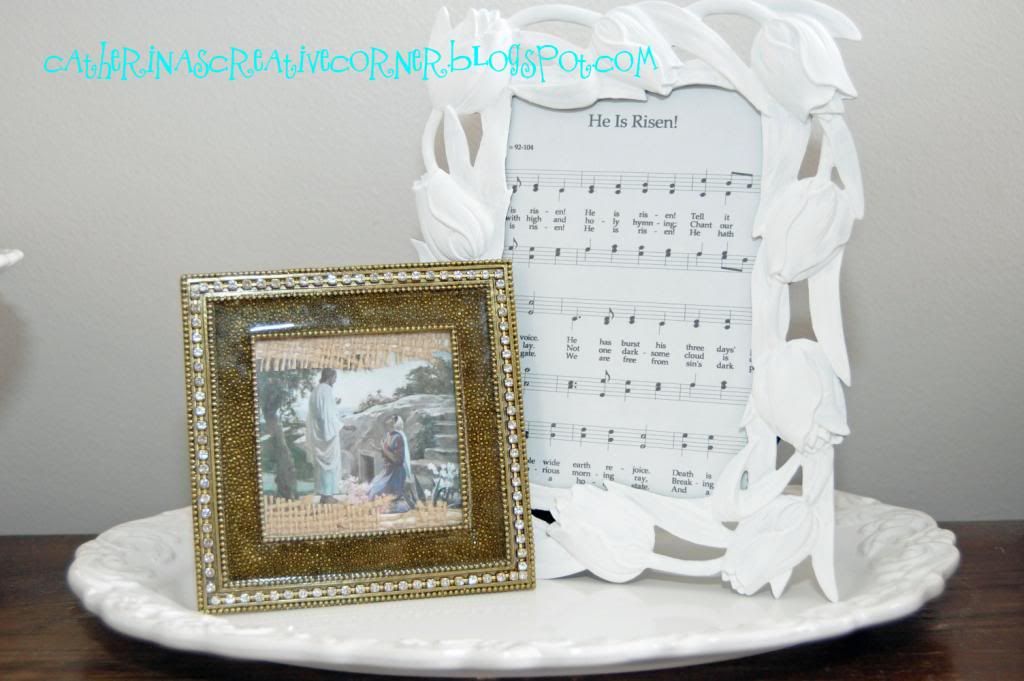
I framed this picture of Jesus Christ and added some burlap to the inside. I have had this tulip frame forever, it is perfect painted white. I than framed my favorite Easter Hymn "He is Risen!" to remind my family what magnificent event took place during that special time so very long ago. 
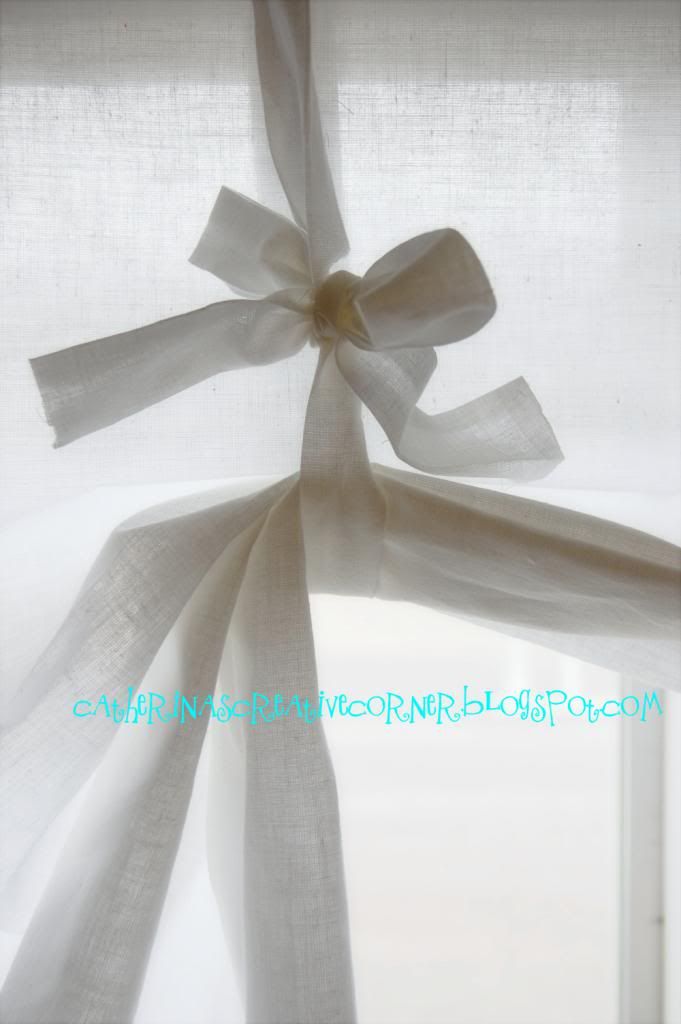
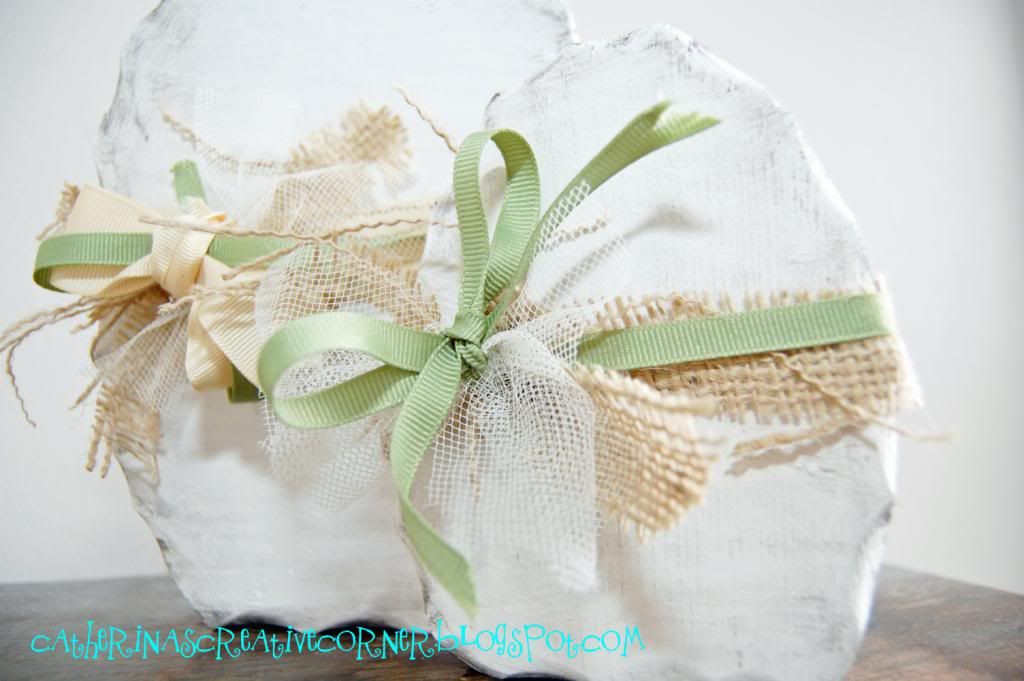
We made these Easter Eggs at my sweet motherinlaws house for a little activity for us girls to do. {Our hubbies were all attending a Church Meeting together that night}. She gave them to us with a dark stain, which was pretty, I tied a few bows around them and took them home. All the other gals where painting them, mostly white or cream {so cute}! I really didnt have the time {baby boy into everything} to paint them pretty that evening. So the next day, I painted them white, threw on some dark stain and rearranged with a few extra ribbons, burlap and toile. Done. Love it! 
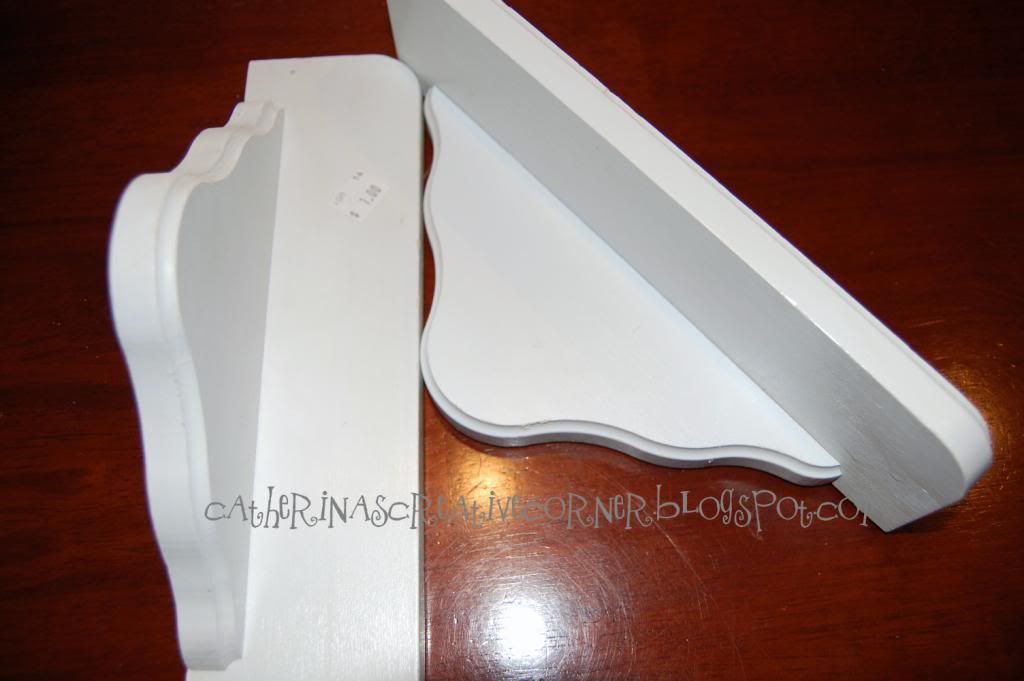
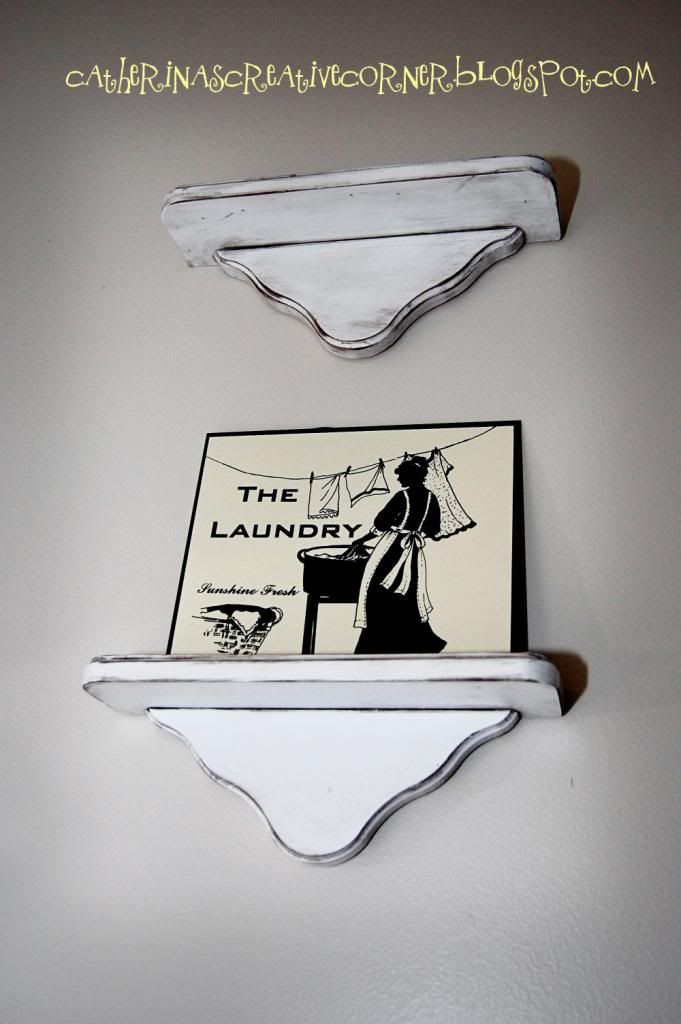
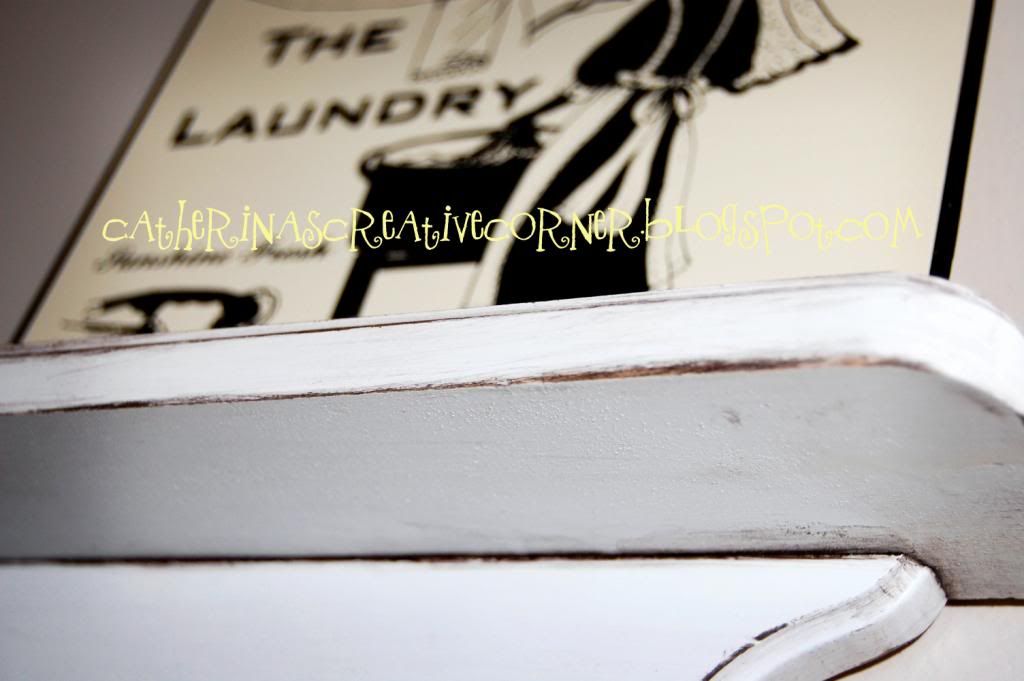
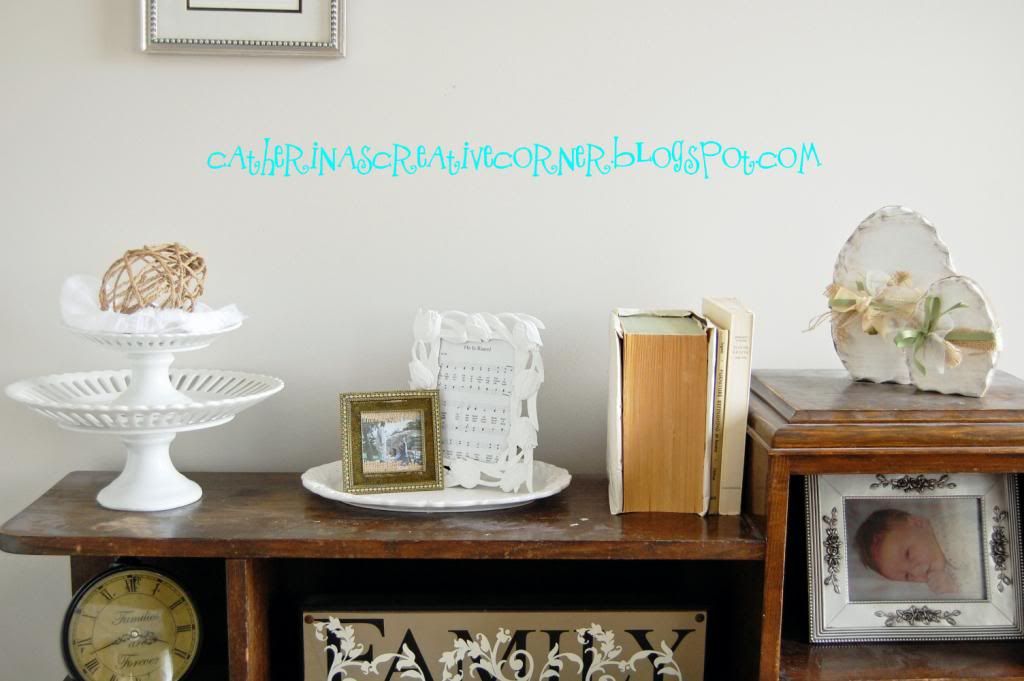
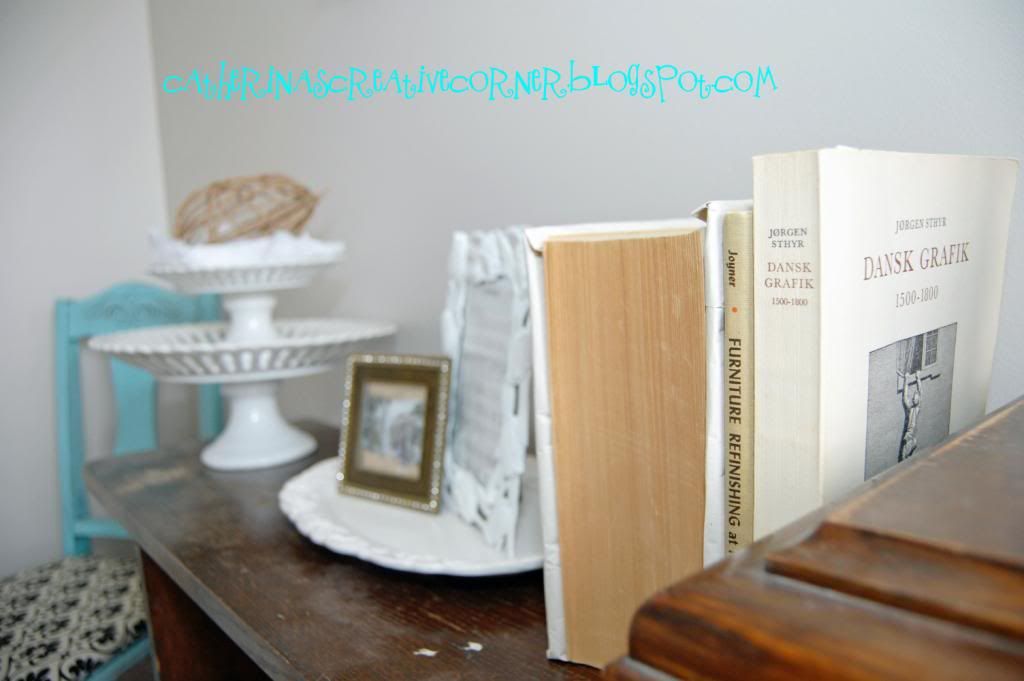
My cute little antique entryway table. {brought it all the way from Denmark 14 yrs ago}. Yes, I know what u r thingking....AMAZING... I do actually have an actual semi entryway! lol. Ahh the joys of living in an apartment! Oh ps, do you like the books? For a unified colorscheme I have found turning them around or wrapping just simple crinkled cream paper {you know, the kind they wrap your dishes in at the store} on the outside of them. Tutorial will follow soon.
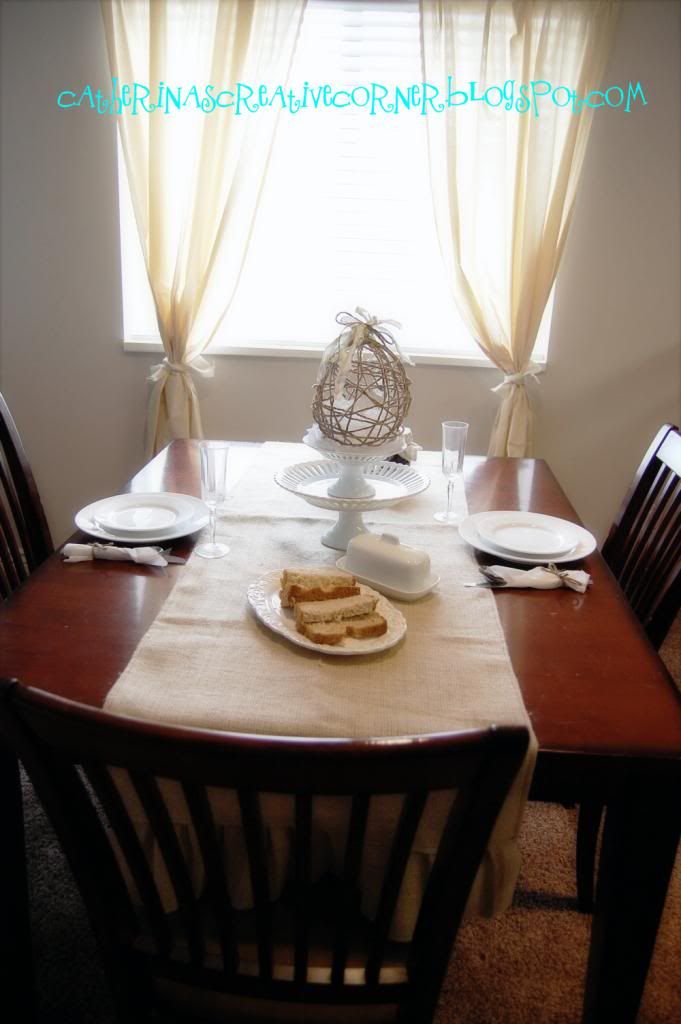
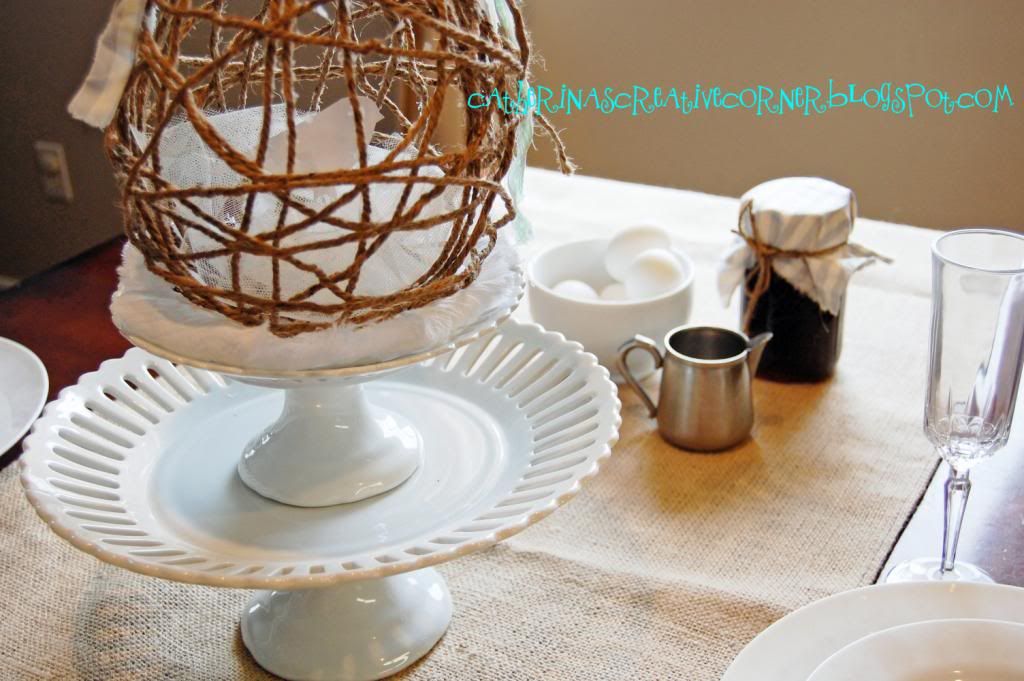
Now...my favorite; a simple Easter Brunch centerpiece;
Jute Egg nest.

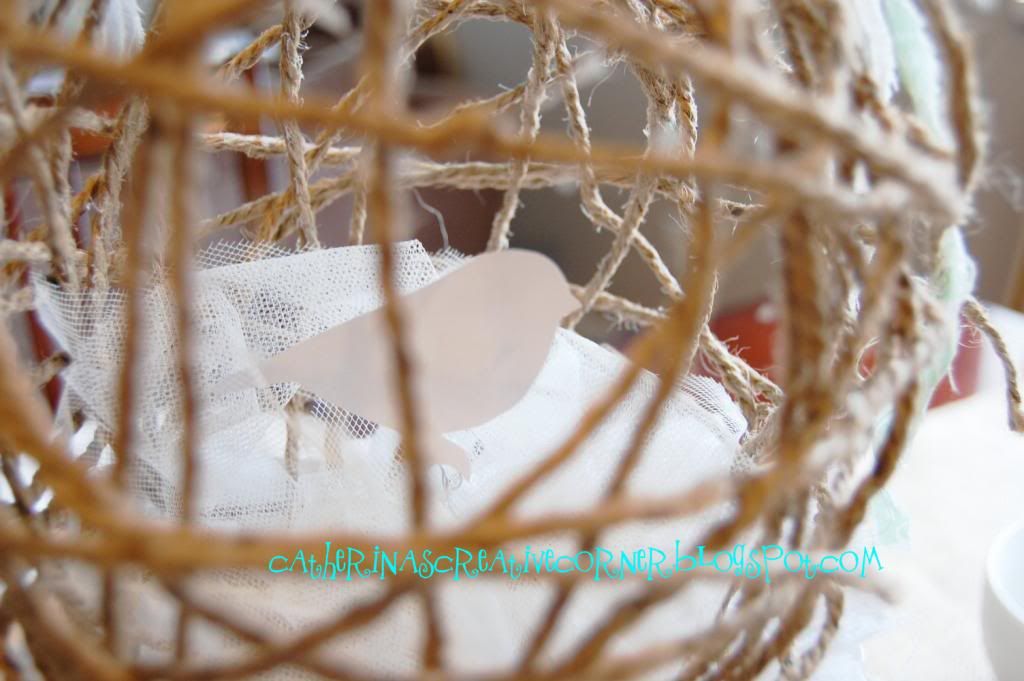
Topped with her green, white and light blue ribbons and her little bird inside! 
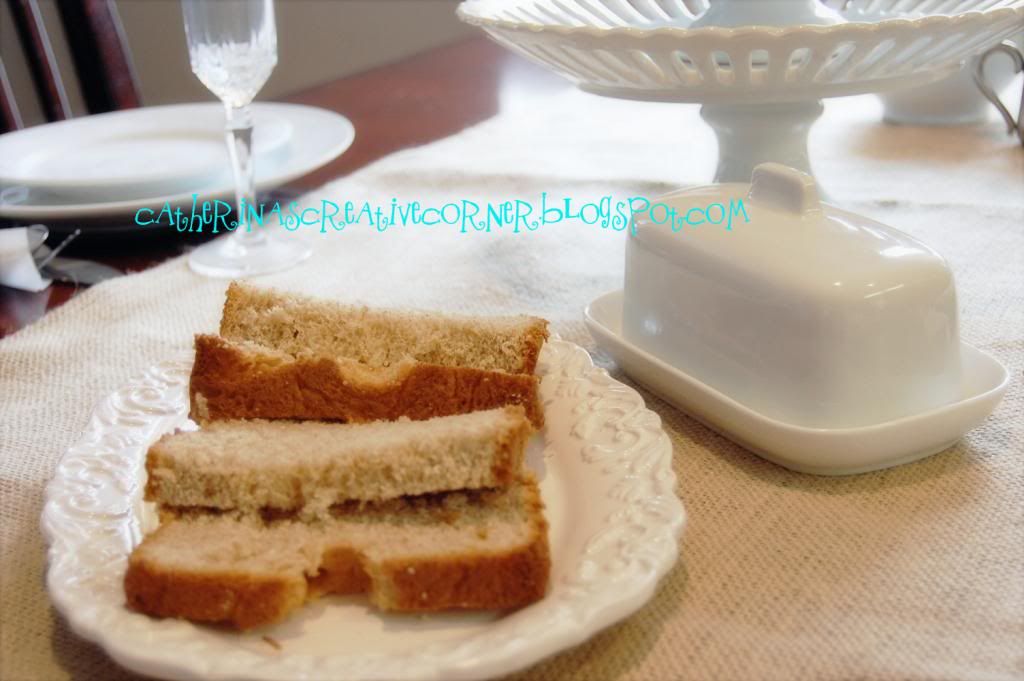
Yummy homemade Wheat Bread, peach jam, butter and eggs. 
Spring is a time for renewal, rebirth, light, and new hope. {I love it}. HAPPY EASTER!
~Cat~

Jute {Easter} Eggs Tutorial

 So here is the recipe so you can make  your own. Feel free to make as many as you want! I only ask (since this is my original idea) that if you want to make your own and post it on the web that you link it back to my blog. AND SEND ME YOUR PICTURES! I want to see what you all can come up with ;-) 
Thanks and have fun creating!
Oh and dont forget to become a Follower:-)
Leave me a comment if you have any questions:-)

You will need:
  • Regular size ballons or water ballons {blown up to desired size of egg}
  • Jute
  • Glue {one that dries clear}
  • water
  • scissors

  1. First blow up your balloons. YOu can either use regular birthday balloons, or water balloons. Just depends on what size you want. I find that water balloons make it more "egg" shaped. Birthday balloons can get to be too "round" if you blow it up too big.
  2. Make a mixture of 1/2 part Water to 1/2 part Glue in a bowl. Mix.
  3. Cut a loooooong piece of Jute {dont worry if you run out during wrapping the ballon, you can just start with a new piece since everything is "glued" together.} 
  4. Drench your Jute trying not to tangle it up too much....dont get scared because it is VERY messy!
  5. Tie your drenched jute end to the top of the ballon and start wrapping it. Begin from the top to the bottom over and over than go cross ways. Kind of play with it, it really is hard to mess it up. Just make sure that it is tight. 
  6. When all done place it on a surface like an old paper bag. Let dry overnight. For the smaller egg {water ballon} it is possible to dry it with a blow dryer, mostly but you must still leave it overnight. The string needs to be completely dry and "crispy" before the next step.
  7. When it is dry wrap your scissors and....POP it! Its like magic when it does, because suddenly you will have a beautiful egg! :-)
Decorate it anyway you want, for the bird nest one the jute was still a bit pliable so I could work my hand into it. I placed toile, ripped fabric for ribbon and a bird silhouette inside.
 For a bird just google bird silhouette images and you can pick what you like. Print it out, cut out with scissors and  trace it onto card stock. Cut THAT out and stick a piece of wire to it so you can stick it right down thru the nest of the egg. 

Simple
Spruced up with a bit of green, blue & white ribbon/fabric strips.


Related Posts Plugin for WordPress, Blogger...